Slicing circuits using qiskit_addon_utils.slicing
Qiskit loosely describes layers as being depth-1 partitions of the circuit across all qubits. Some Qiskit addons make use of the term slices to describe layers of arbitrary depth. More concretely, slices can be defined as time-like partitions of a QuantumCircuit which span all qubits. Similar to layers, composing all slices of a
QuantumCircuit produces a circuit which is semantically equivalent to the original.
The qiskit_addon_utils.slicing module provides a few utilities for partitioning QuantumCircuits into slices. This is for example useful for operator backpropagation We will give an overview of those tools in this guide.
Note: Throughout this guide, we will slice the circuit and use qiskit_addon_utils.slicing.combine_slices to recombine the slices with barriers to make it easier to visualize the slices.
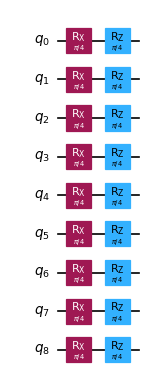
First, we’ll create a circuit from which we’ll create slices.
[1]:
import numpy as np
from qiskit import QuantumCircuit

num_qubits = 9
qc = QuantumCircuit(num_qubits)
qc.ry(np.pi / 4, range(num_qubits))
qubits_1 = [i for i in range(num_qubits) if i % 2 == 0]
qubits_2 = [i for i in range(num_qubits) if i % 2 == 1]
qc.cx(qubits_1[:-1], qubits_2)
qc.cx(qubits_2, qubits_1[1:])
qc.cx(qubits_1[-1], qubits_1[0])
qc.rx(np.pi / 4, range(num_qubits))
qc.rz(np.pi / 4, range(num_qubits))
qc.draw("mpl", scale=0.6)
[1]:
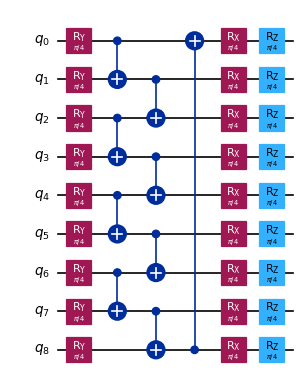
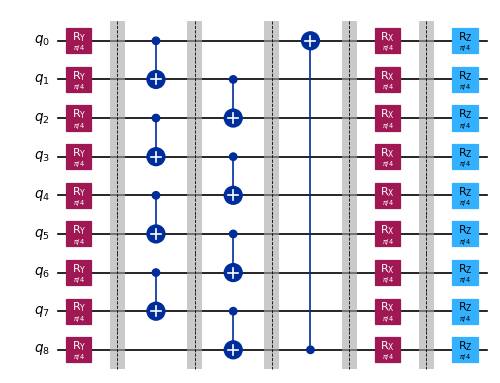
In the case where there is no clear way to exploit the structure of the circuit for back-propagation, a user may wish to simply partition their circuit into slices of a given depth. Here, we’ll separate this circuit into depth-1 slices.
[2]:
from qiskit_addon_utils.slicing import combine_slices, slice_by_depth

slices = slice_by_depth(qc, 1)
combined_slices = combine_slices(slices, include_barriers=True)
combined_slices.draw("mpl", scale=0.6)
[2]:
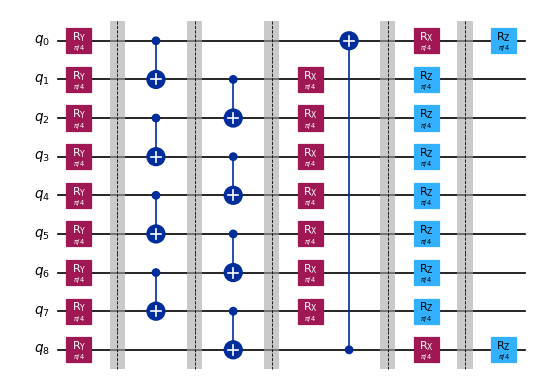
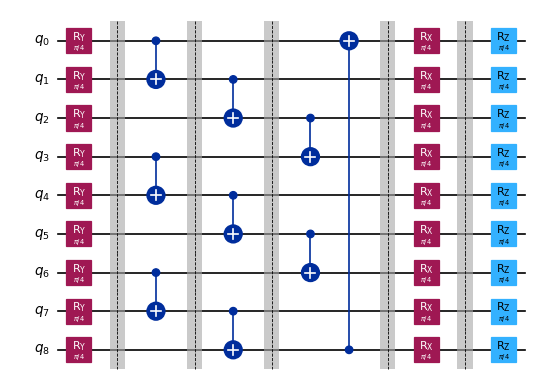
Now let’s try depth-2.
[3]:
slices = slice_by_depth(qc, 2)
combined_slices = combine_slices(slices, include_barriers=True)
combined_slices.draw("mpl", scale=0.6)
[3]:
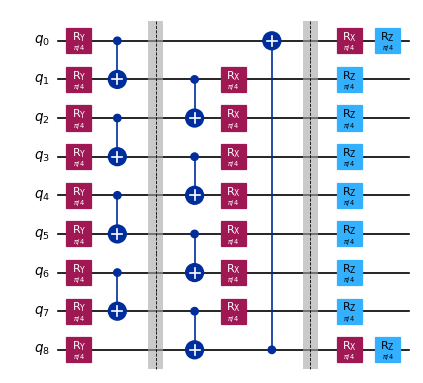
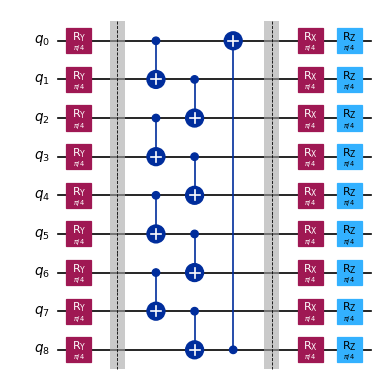
In many cases, such as Trotter circuits, it may be advantageous to slice by gate type. Slices holding a given gate type will be further split out into depth-1 slices, as there is little downside in doing so.
[4]:
from qiskit_addon_utils.slicing import slice_by_gate_types

slices = slice_by_gate_types(qc)
combined_slices = combine_slices(slices, include_barriers=True)
combined_slices.draw("mpl", scale=0.6)
[4]:
If your circuit was designed to exploit the physical qubit connectivity, you may want to create slices based on an edge coloring. Here, we will assign a 3-coloring to the circuit edges and slice the circuit with respect to the edge coloring. This only affects non-local gates. Single qubit gates will be added to their own slices by gate type.
[5]:
from qiskit_addon_utils.slicing import slice_by_coloring

# Assign a color to each set of connected qubits
coloring = {}
for i in range(num_qubits - 1):
    coloring[(i, i + 1)] = i % 3
coloring[(num_qubits - 1, 0)] = 2

# Create a circuit with operations added in order of color
qc = QuantumCircuit(num_qubits)
qc.ry(np.pi / 4, range(num_qubits))
edges = [edge for color in range(3) for edge in coloring if coloring[edge] == color]
for edge in edges:
    qc.cx(edge[0], edge[1])
qc.rx(np.pi / 4, range(num_qubits))
qc.rz(np.pi / 4, range(num_qubits))

# Create slices by edge color
slices = slice_by_coloring(qc, coloring=coloring)
combined_slices = combine_slices(slices, include_barriers=True)
combined_slices.draw("mpl", scale=0.6)
[5]:
For more custom slicing strategies a user may wish to place barriers in the locations they want to slice and use the slice_by_barriers function. Here, we will create 3 slices, one for each rotation layer and one for the entangling layer.
[6]:
qc = QuantumCircuit(num_qubits)
qc.ry(np.pi / 4, range(num_qubits))
qc.barrier()
qubits_1 = [i for i in range(num_qubits) if i % 2 == 0]
qubits_2 = [i for i in range(num_qubits) if i % 2 == 1]
qc.cx(qubits_1[:-1], qubits_2)
qc.cx(qubits_2, qubits_1[1:])
qc.cx(qubits_1[-1], qubits_1[0])
qc.barrier()
qc.rx(np.pi / 4, range(num_qubits))
qc.rz(np.pi / 4, range(num_qubits))
qc.draw("mpl", scale=0.6)
[6]:
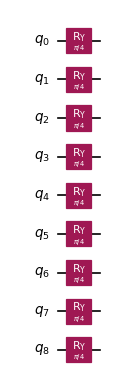
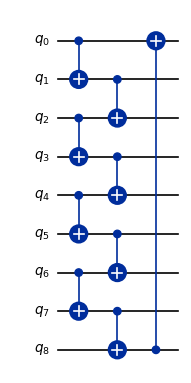
We will not draw the re-combined slices as a single circuit since it would look identical to the input circuit. Instead, below we draw each slice on its own.
[7]:
from qiskit_addon_utils.slicing import slice_by_barriers

slices = slice_by_barriers(qc)
slices[0].draw("mpl", scale=0.6)
[7]:
[8]:
slices[1].draw("mpl", scale=0.6)
[8]:
[9]:
slices[2].draw("mpl", scale=0.6)
[9]: