Use edge coloring to reduce the depth of quantum circuits
This guide will show how to use the qiskit_addon_utils.coloring module to color edges of a coupling map and use the coloring to more efficiently place gates in a quantum circuit, leading to shallower circuits.
The point of edge-coloring a graph is to find a set of edge colors such that no two edges of the same color share a common node. For a quantum processor, this means that gates along like-colored edges (qubit connections) may be run simultaneously and that the circuit will execute faster. We can use this to define our circuit in a way that is more amenable to the hardware it should run on.
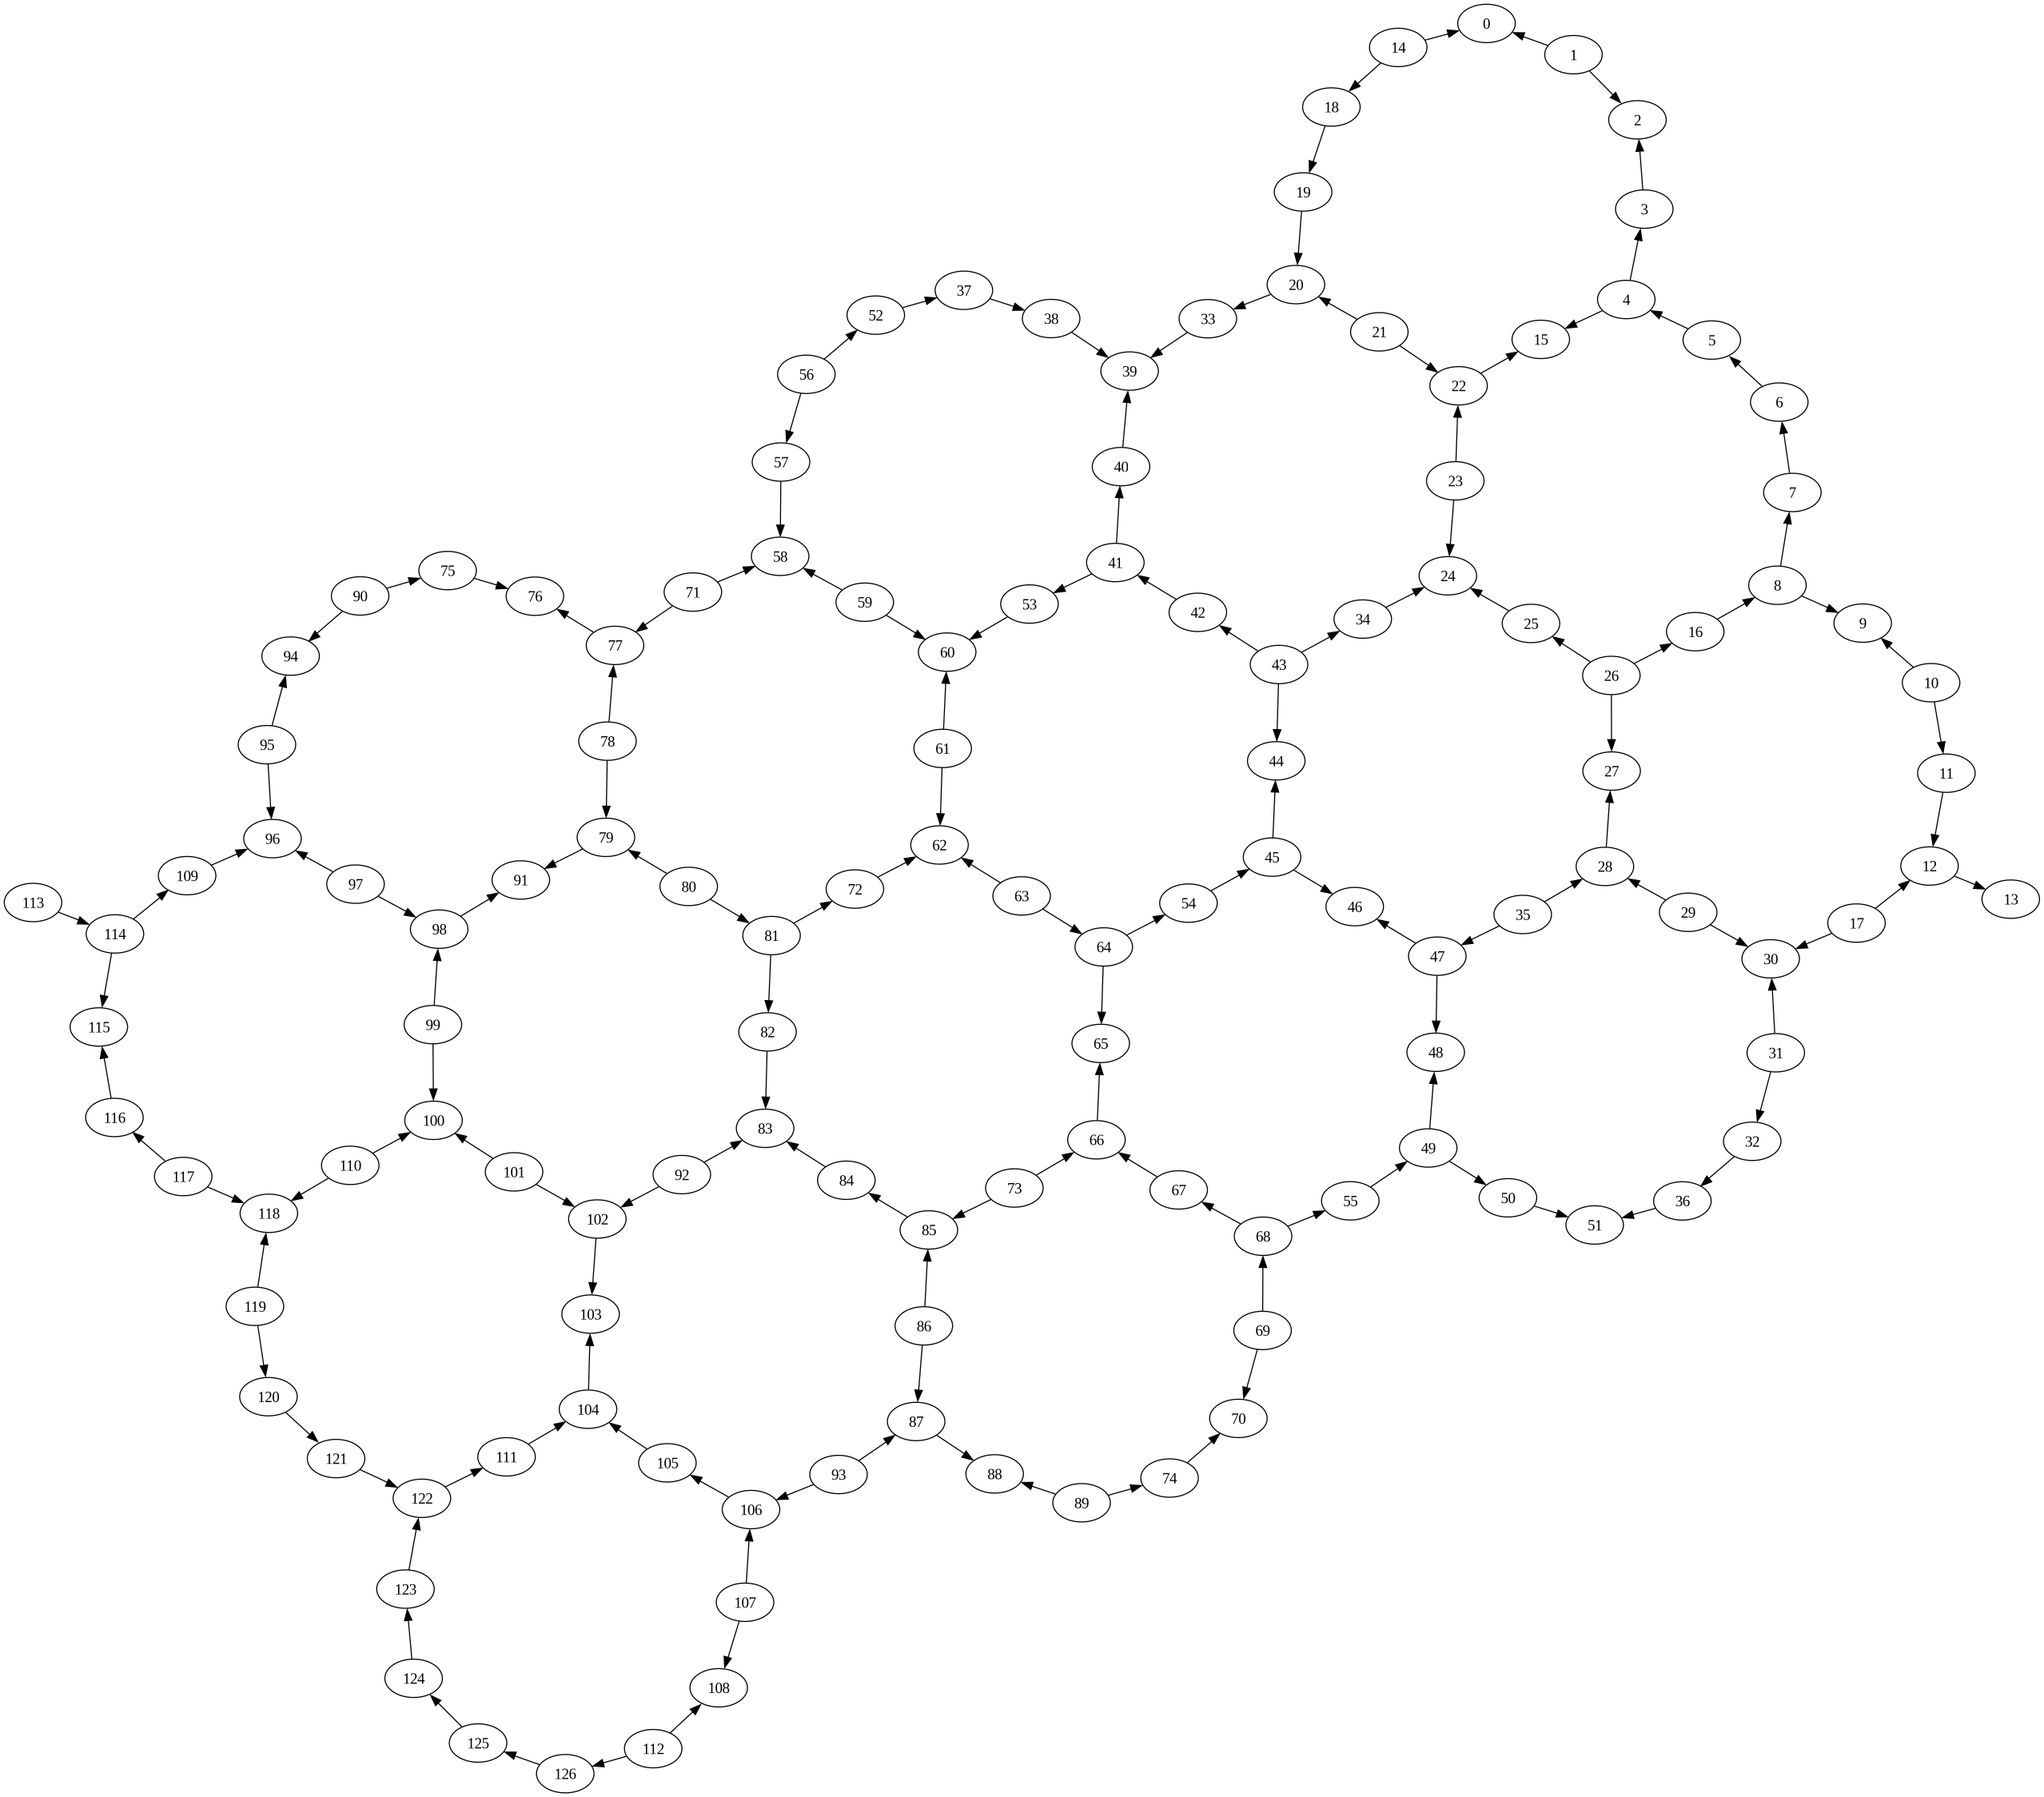
First, we will specify a backend and visualize its qubit topology.
[1]:
from qiskit_ibm_runtime.fake_provider import FakeSherbrooke

backend = FakeSherbrooke()
coupling_map = backend.coupling_map
[2]:
from rustworkx.visualization import graphviz_draw

graphviz_draw(coupling_map.graph, method="neato")
[2]:

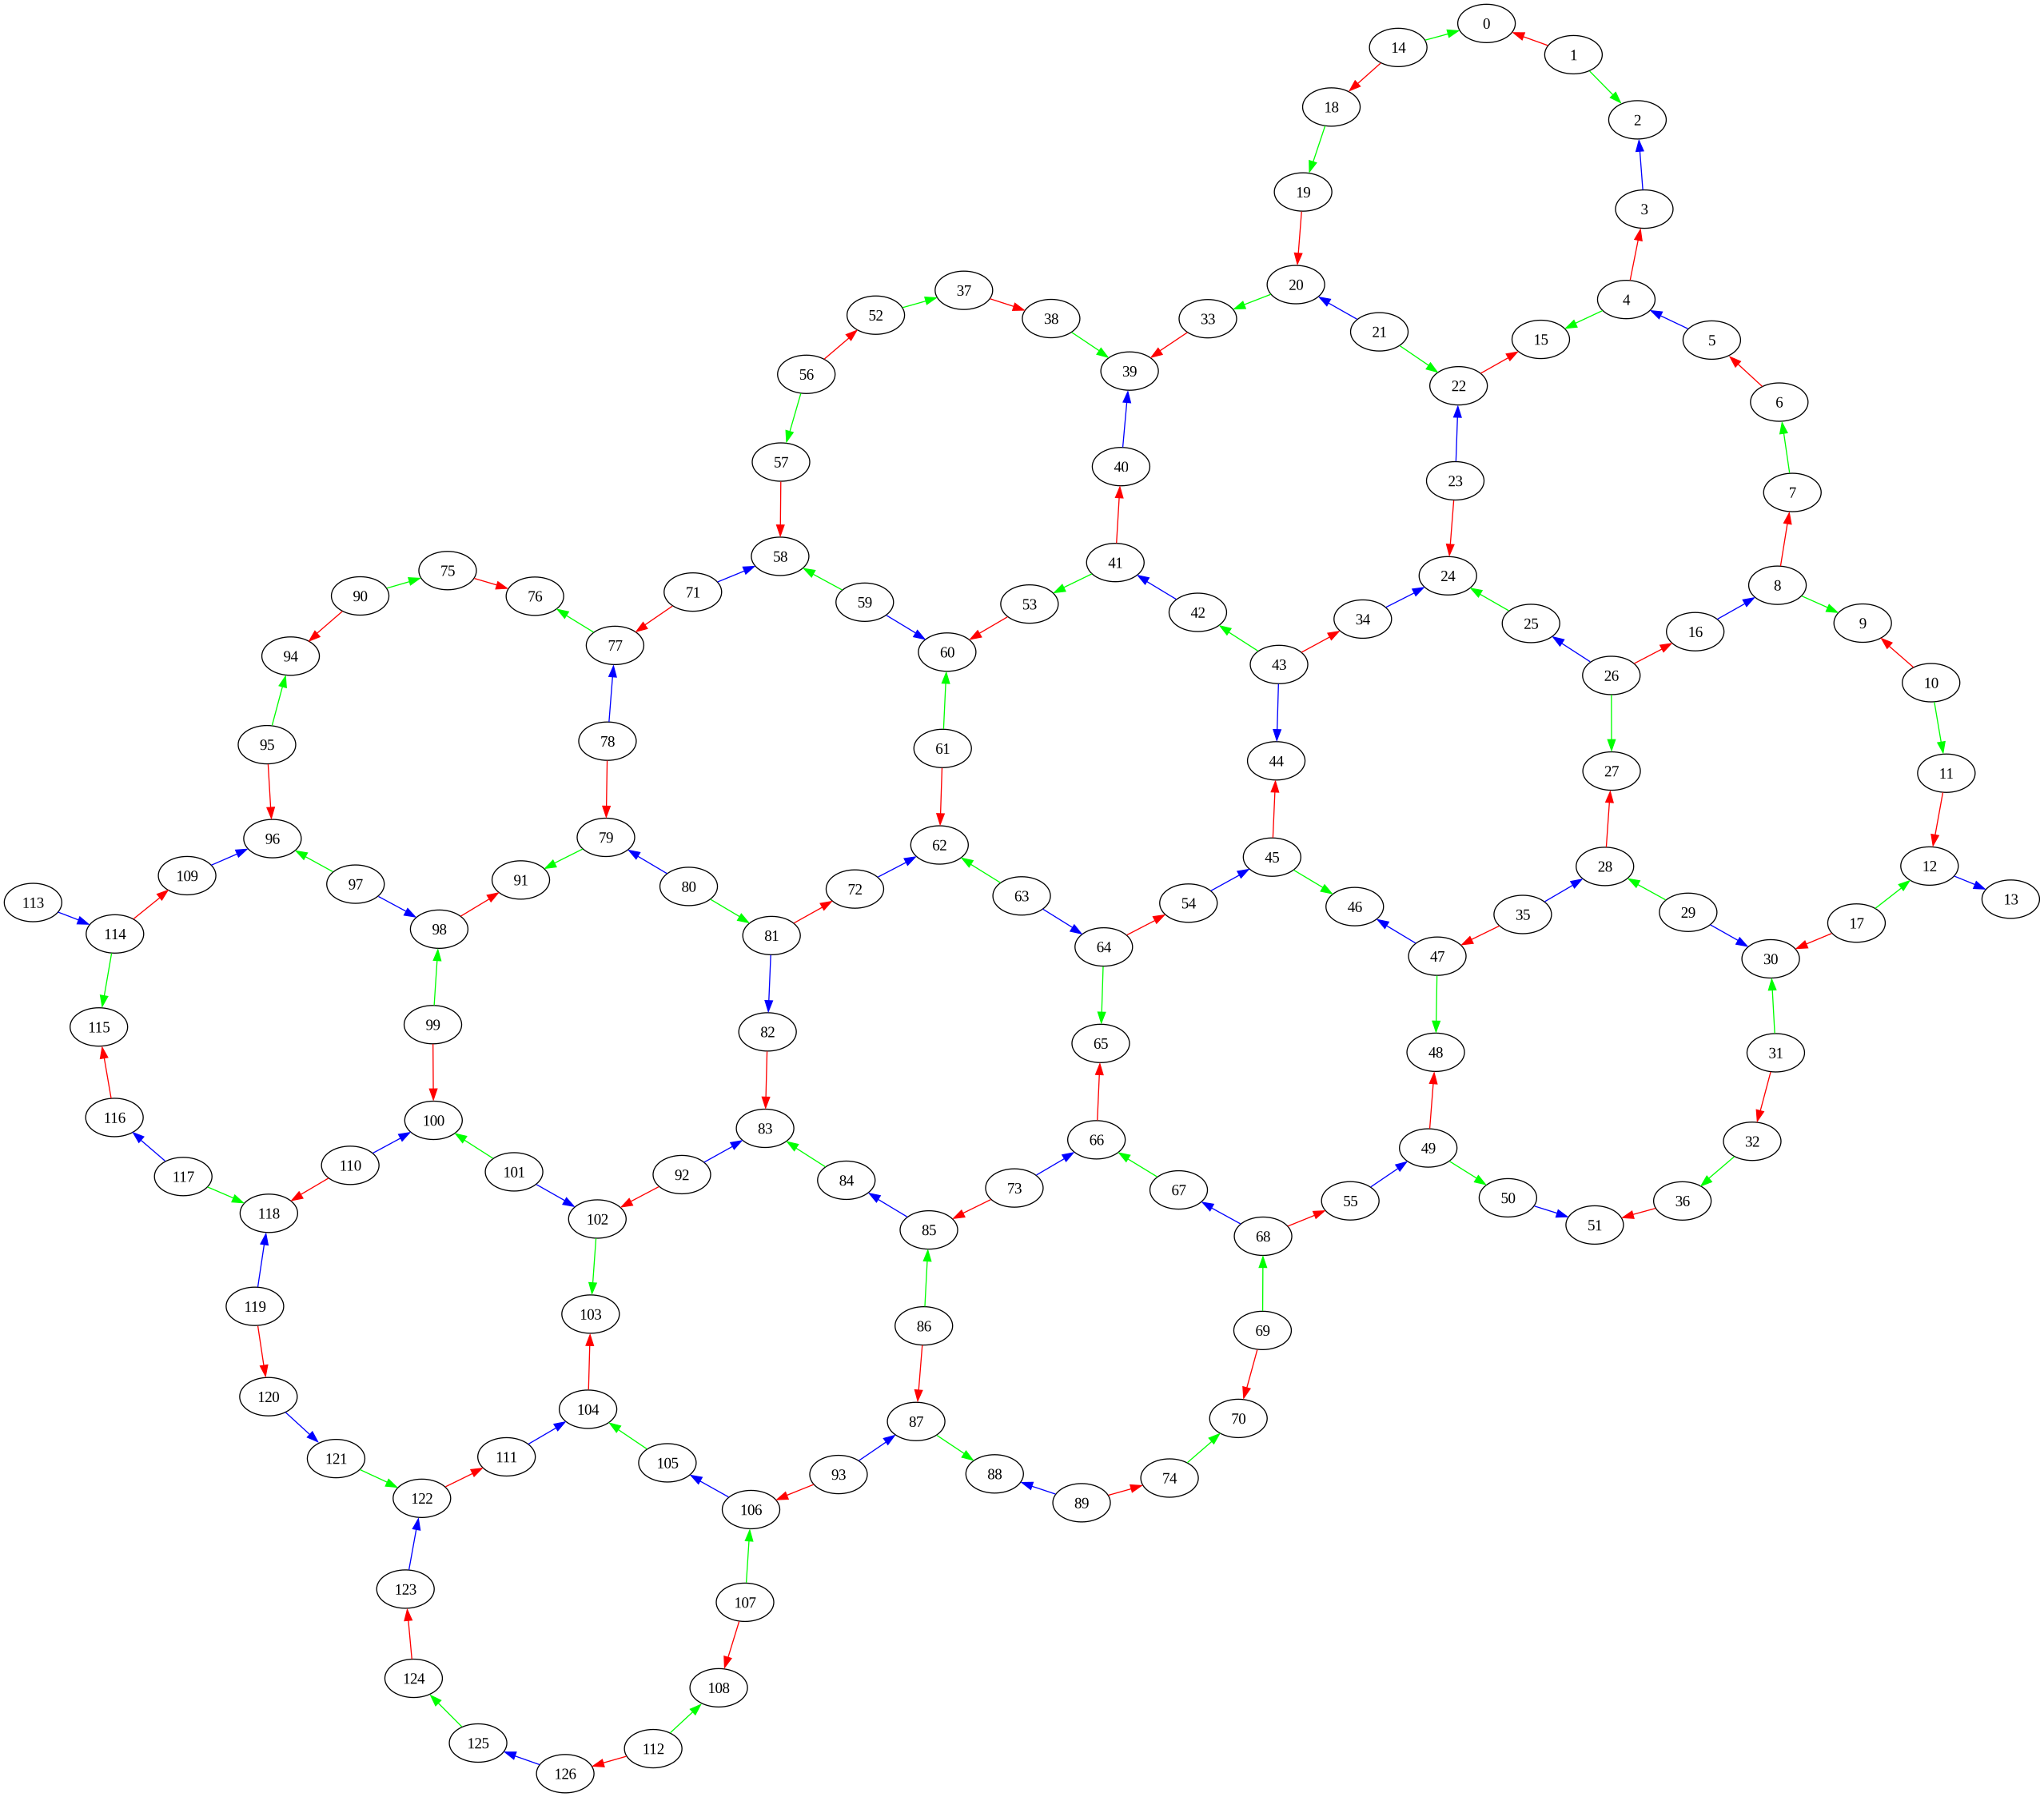
Next we use the qiskit_addon_utils.coloring.auto_color_edges function to generate an edge coloring. This is a light wrapper for rustworkx.graph_greedy_edge_color that does some minor post-processing of the output. Namely, this function removes an arbitrary edge direction if an edge is bi-directional and combines the edge and color information into a dictionary format.
[3]:
from qiskit_addon_utils.coloring import auto_color_edges
from rustworkx import PyDiGraph

coloring = auto_color_edges(coupling_map)

# Create a colored graph for visualization
eagle_r3 = PyDiGraph()
eagle_r3.extend_from_weighted_edge_list(
    [(source, target, color) for ((source, target), color) in coloring.items()]
)
print(f"There are {len(coloring)} edges and {len(set(coloring.values()))} unique colors.")
print(
    f'The edges are specified by length-2 tuples: (e.g. {next(iter(coloring))}).\
    \nThe "colors" are actually specified by a set of integers: {set(coloring.values())}'
)
There are 144 edges and 3 unique colors.
The edges are specified by length-2 tuples: (e.g. (1, 0)).
The "colors" are actually specified by a set of integers: {0, 1, 2}
[4]:
def color_edge_3color(edge):
    """Return the color of an edge."""
    # Map integers of a 3-coloring to color names
    color_dict = {0: "red", 1: "green", 2: "blue"}
    return {"color": color_dict[edge]}


graphviz_draw(eagle_r3, edge_attr_fn=color_edge_3color, method="neato")
[4]:

Next, let’s make a circuit with a CZGate on each edge and observe its depth. For this first circuit, we will just naively place a gate on each edge. We will place barriers in depth-1 increments (using qiskit_addon_utils.slicing.slice_by_depth) to illustrate how crucial edge-coloring is when designing a hardware-efficient quantum circuit.
[5]:
from qiskit import QuantumCircuit
from qiskit_addon_utils.slicing import combine_slices, slice_by_depth

circuit = QuantumCircuit(backend.num_qubits)

for edge in coupling_map.graph.edge_list():
    circuit.cz(edge[0], edge[1])

print(f"The circuit has depth: {circuit.depth()}")

# Add barriers in depth-1 increments
slices = slice_by_depth(circuit, max_slice_depth=1)
circuit = combine_slices(slices, include_barriers=True)

circuit.draw("mpl", fold=-1)
The circuit has depth: 37
[5]:

Now let’s place all of the gates of a given color at the same time. We can see the depth is reduced from 37 to 3. This is because we can take advantage of the fact that all gates on a given color can run at the same time.
[6]:
from collections import defaultdict

circuit = QuantumCircuit(backend.num_qubits)

# Make a reverse coloring dict
color_to_edge = defaultdict(list)
for edge, color in coloring.items():
    color_to_edge[color].append(edge)

# Place edges in order of color
for edges in color_to_edge.values():
    for edge in edges:
        circuit.cz(edge[0], edge[1])

print(f"The circuit has depth: {circuit.depth(lambda x: x.name != 'barrier')}")

# Add barriers in depth-1 increments
slices = slice_by_depth(circuit, max_slice_depth=1)
circuit = combine_slices(slices, include_barriers=True)

circuit.draw("mpl", fold=-1)
The circuit has depth: 3
[6]:
