Create a New Documentation Project
Note
This page was written in the style of a Tutorial according to The Diátaxis Framework.
In this tutorial you will use the sphinx-quickstart command to create a new
documentation project for a repository in the Qiskit Ecosystem with Sphinx.
Then, you will structure the resulting documentation according to the Qiskit standard and make sure
Qiskit’s Sphinx HTML theme, the qiskit_sphinx_theme, is used. After that, you will create a
GitHub workflow to deploy your documentation to qiskit.org/ecosystem (only applicable
for selected projects) with Rclone.
Background information
Before you dive into the creation of the documentation project, it’s important to know what reStructuredText and Sphinx are.
reStructuredText (RST) is a lightweight markup language, that is, an easy to read language that formats plaintext documents according to a set of tags. It enables the creation of web pages and documentation from, for example, Python docstrings.
Sphinx is a documentation generator that converts RST files to formats like HTML, LaTeX, ePub, Texinfo, manual pages or plain text. It is written in Python. The qiskit_sphinx_theme will focus on converting RST to HTML pages.
Install the qiskit_sphinx_theme
In order to use use the qiskit_sphinx_theme you need to first install it. You can do that with pip by running this:
pip install qiskit-sphinx-theme
Note
sphinx is installed as an dependency with qiskit-sphinx-theme, so it’s not necessary to install it with pip install sphinx for this tutorial.
Create the documentation in your repository
In order to create a documentation folder you can use sphinx-quickstart. It asks some questions and creates a functional documentation folder according to your answers.
You can use sphinx-quickstart by going to the root directory of your repository and running this command.
sphinx-quickstart docs
So the new folder will be called docs. Then you will get this output:
Please enter values for the following settings (just press Enter to
accept a default value, if one is given in brackets).

Selected root path: docs

You have two options for placing the build directory for Sphinx output.
Either, you use a directory "_build" within the root path, or you separate
"source" and "build" directories within the root path.
> Separate source and build directories (y/n) [n]:
In this case, you will give the default answer, that is, the one between brackets (n), so you will not separate the source and build directories. To do this you only need to press ENTER.
The project name will occur in several places in the built documentation.
> Project name: <Enter Your Project Name, e.g. qiskit-hal-provider>
> Author name(s): <Enter Author Names or a Team, e.g. Qiskit HAL Provider Development Team>
> Project release []: <Enter Project Release Corresponding to the Documentation, e.g. 0.1.0>
This time you need to give non-default answers. Set your project name and put your development team
name as the author name. If you have a release cycle you can put your current version in the project
release field. Throughout this tutorial, we will use Qiskit HAL Provider as an example.
If the documents are to be written in a language other than English,
you can select a language here by its language code. Sphinx will then
translate text that it generates into that language.

For a list of supported codes, see
http://sphinx-doc.org/config.html#confval-language.
> Project language [en]:
Here the language will be English, that is, the default.
Creating file ./docs/conf.py.
Creating file ./docs/index.rst.
Creating file ./docs/Makefile.
Creating file ./docs/make.bat.

Finished: An initial directory structure has been created.
The new folder will consist of:
index.rst: the RST file that will make up the home page when built as HTML.conf.py: a file that includes all the Sphinx configuration settings.Makefile(ormake.batfor Windows): files that enable you to build documentation usingmake._templates: a folder for your own HTML templates (now empty)._static: a folder for static files like images (now empty)._build: a folder for built documentation (now empty).
Even though you have created a working Sphinx documentation folder, you are not using the qiskit_sphinx_theme yet. In order to do that, you need to open conf.py
and change the value of the variable html_theme from 'alabaster' to 'qiskit_sphinx_theme'.
Structure your documentation
In Qiskit and its Ecosystem, we are following The Diátaxis Framework, that means that our documentation is divided into four categories:
In order to do that, you need to create 4 new folders inside the docs folder, that you will call tutorials, how_to, apidocs and explanations. Inside each one of them, add an empty (to start with) index.rst.
Apart from that, you should add a release_notes.rst for putting release notes and a getting_started.rst containing installation instructions and a “hello world” example to the docs folder.
In short, the recommended structure of your documentation is:
docs/
|--conf.py
|--index.rst
|--getting_started.rst
|--release_notes.rst
|--tutorials/
|  |--index.rst
|--how_to/
|  |--index.rst
|--apidocs/
|  |--index.rst
|--explanations/
   |--index.rst
Build your documentation locally
Now that you have created your documentation project, it’s recommended to build it locally to check whether it looks and works as intended.
In order to do that, you first need to have your package installed. You can do this by running the following command on the root directory of your local copy of the repository:
pip install .
Apart from the package, there are other dependencies that are necessary for building the documentation. All of them should be already included in the repo in a text file called requirements-dev.txt,
so you only need to run:
pip install -r requirements-dev.txt
The -r flag means that instead of installing a package called “requirements-dev.txt”, you are installing the packages listed in the requirements text file requirements-dev.txt.
Once you have made the installations, you can finally build your documentation with sphinx-build, setting the builder (-b)
to html so the documents from the docs folder get built as HTML pages in a new folder, that you will call docs/_build/html. So the final command is:
sphinx-build -b html docs docs/_build/html
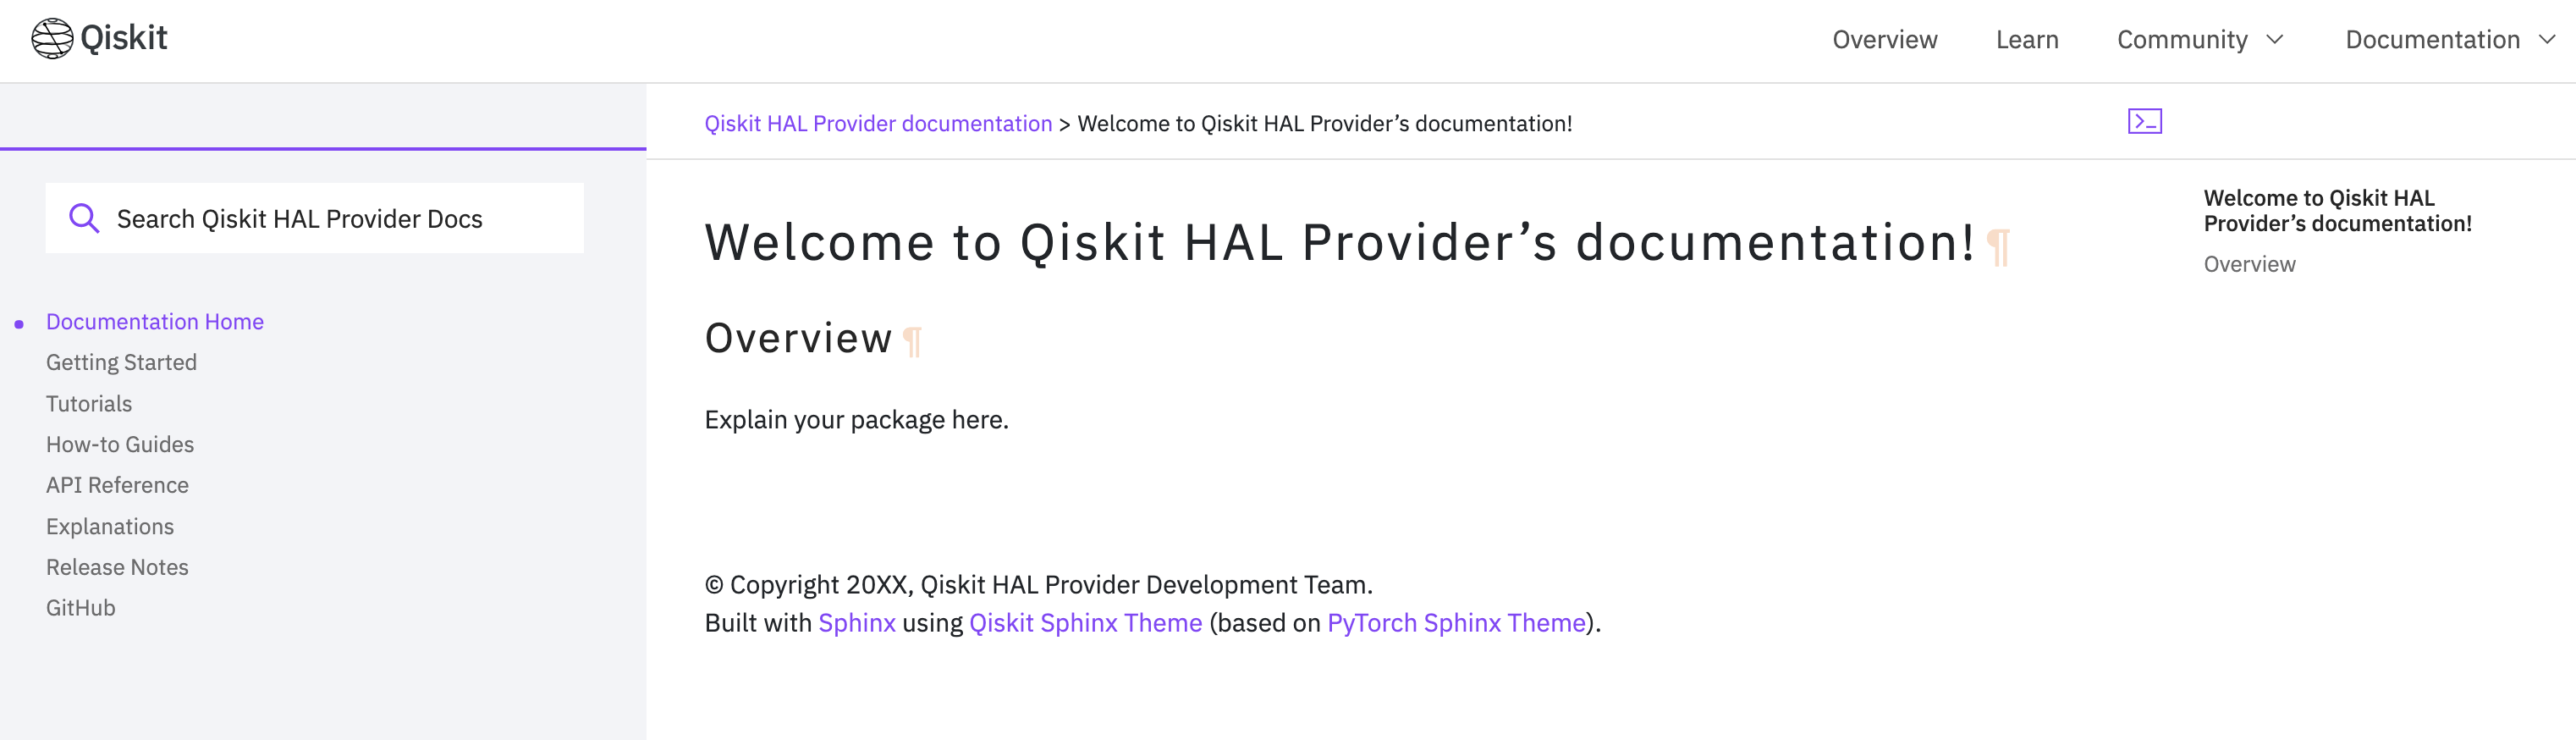
The locally built page should look like this:
Deploy docs to qiskit.org/ecosystem
Note
At the moment, this section is only applicable for selected Qiskit projects such as Qiskit and Qiskit Nature. For other projects, you can deploy your own documentation using Read the Docs or GitHub pages.
Once you have a working documentation project, you may want to deploy it to qiskit.org/ecosystem. This can be done by using GitHub workflows.
These workflows are automated processes that are defined by YAML files. These files should be placed in a directory called .github/workflows.
A workflow can be configured to be triggered by one or more events. It is divided into one or more jobs, each one formed by at least one step. A step consists of running a script you define or an action, that is, an application that performs a complex but usually repeated task.
For documentation deployment, create a file called deploy-docs.yml inside the directory .github/workflows.
The first thing you need to include in this file is the name of your workflow via the key name. In particular, this workflow will be called Deploy Docs so your next line is:
name: Deploy Docs
The next step is to set the event that triggers this workflow. This is done with the key on. In this case, the workflow will be triggered manually. This can be set with the workflow_dispatch event.
on:
  workflow_dispatch:
Note
It is recommended to use a 2-space indentation for YAML files.
In order to avoid having more than one job or workflow running at the same time you will use a concurrency group. The idea behind these groups is that only one job or workflow from each group can be run at the same time.
In this case we will distinguish by repository name, branch ref, source branch ref and workflow. All of these can be accessed via the github context as github.repository, github.ref, github.head_ref and github.workflow respectively.
These properties can be accessed with the expression syntax, that is, ${{ <expression> }}. In order to cancel any currently running workflows from the concurrency group you can set cancel-in-progress to true.
concurrency:
  group: ${{ github.repository }}-${{ github.ref }}-${{ github.head_ref }}-${{ github.workflow }}
  cancel-in-progress: true
Once this setup is done, you can start creating the jobs.
Publish docs
The job will consist of publishing the documentation and will be called docs_publish.
Set up the job
In order to make sure that the deployment only comes from a stable branch and is triggered by a maintainer, you can use the if
key. The first condition can be written using the startsWith expression by checking whether github.ref starts with refs/heads/stable. For the second condition, you can use the contains expression to check whether
github.actor, that is the user that triggers the workflow, is a maintainer. This job will use the latest version of Ubuntu. To ensure that, you will set the runs-on key to ubuntu-latest.
Finally, you will use the strategy key to create a matrix in which the Python version will be included. In this case, the version will be 3.8.
This matrix will be called python-version and its value will be [3.8].
jobs:
  docs_publish:
    if: ${{ startsWith(github.ref, 'refs/heads/stable') && contains('["maintainer-1","maintainer-2", ...]', github.actor) }}
    runs-on: ubuntu-latest
    strategy:
      matrix:
        python-version: [3.8]
    steps:
Steps
Check-out the repository
The first step of this job consists of enabling the workflow to access your repository. To do that you only need to call the latest version (version 3, @v3) the pre-defined checkout action with the uses key.
By setting the fetch-depth parameter to 0 via the with key, you can let the action reach for the full history of your repository.
- uses: actions/checkout@v3
  with:
    fetch-depth: 0
Setup Python
Once your repo has been reached, the workflow continues by installing a Python version, in this case, the 3.8, as defined in matrix.python-version. Fortunately, the
setup-python action already does this for us!. To choose the Python version you only need to set the python-version parameter with the corresponding value.
- uses: actions/setup-python@v4
  with:
    python-version: ${{ matrix.python-version }}
Install the package
Now that you have Python, let’s install our package and its more immediate dependencies and constraints from requirements-dev.txt and constraints.txt respectively.
You can use the run key and add the usual bash commands as a multiline block with the pipe indicator |. These commands are: pip install -e . for the editable (-e) version of the package, pip install -U -r requirements-dev.txt for the latest version (-U) of the requirements (-r) and pip install -c constraints.txt for the constraints (-c).
You can set the shell to bash via the
shell keyword.
- name: Install <Package Name>
  run: |
    pip install -e .
    pip install -U -c constraints.txt -r requirements-dev.txt
  shell: bash
Install other dependencies
In case there are another dependencies that are not covered in the requirements-dev.txt, you can add them in a similar step.
- name: Install Dependencies
  run: |
    pip install python_packages
    sudo apt-get install -y other_packages
  shell: bash
The meaning of these Python dependencies is that they are not needed for our package to work nor to build documentation in general but might be used in some specific part of it. For example,
the Torch Connector tutorial from qiskit-machine-learning uses
the Python package torchvision to load a dataset. This repo also includes some non-Python dependencies like pandoc or graphviz that can’t be installed with pip, so
apt-get has to be used instead.
Build and publish to qiskit.org/ecosystem
If you are deploying your documentation to a qiskit.org/ecosystem domain, then your documentation will need to be deployed to IBM Cloud Object Storage, where qiskit.org is hosted, with Rclone, a command-line program that enables you to manage content from the cloud.
Before starting with this step, it is necessary to ask a Qiskit organization administrator to create a data container or bucket called, following our HAL Provider example, qiskit-org-web-resources/ecosystem/hal-provider, from whose content the page qiskit.org/ecosystem/hal-provider will be generated,
and to add some encrypted credentials to your repo. These credentials are:
The Rclone configuration file, that will be saved as
tools/rclone.conf.enc.The secret key and initialization vector with which that configuration file is encrypted, that will be saved as repository secrets called
encrypted_rclone_keyandencrypted_rclone_ivrespectively.
Note
Both the configuration file, secret key and initialization vector are the same across all of the Ecosystem’s packages supported by IBM. They can be found
in this repository as rclone.conf.txt and rclone_encrypt_secrets.txt.
Once these credentials are included in your repo, you can set up the environment variables needed for this step. This is done with the env keyword.
The first two variables will be the encrypted_rclone_key and encrypted_rclone_iv, that can be accessed with the secrets context and the expression syntax, that is, ${{ <expression> }}.
Then, you will disable the use of Python multiprocessing to parallelize operations by setting the QISKIT_PARALLEL variable to False and enable the tutorials build by setting the QISKIT_DOCS_BUILD_TUTORIALS to 'always'.
So the step will start looking like this:
- name: Build and publish
  env:
    encrypted_rclone_key: ${{ secrets.encrypted_rclone_key }}
    encrypted_rclone_iv: ${{ secrets.encrypted_rclone_iv }}
    QISKIT_PARALLEL: False
    QISKIT_DOCS_BUILD_TUTORIALS: 'always'
When deploying documentation to qiskit.org/ecosystem, it’s important to make sure that only the release notes that correspond to the desired release are being uploaded. For this purpose you will create a subscript called tools/ignore_untagged_notes.sh that will be called from the workflow.
This file will start with this shebang:
#!/bin/bash
Its function is to indicate that the script will be run with the Bash shell.
The first thing you will want to find is the tag that corresponds to the latest release of your package. This is precisely the idea behind git describe.
In particular, you can use the --tags option to ensure all the tags are used instead of only the annotated ones and the --abrev=0 option to suppress long format. This value will be useful later, so you’ll save
it as a variable called LATEST_TAG with the VARIABLE=$(command) syntax from Bash.
LATEST_TAG=$(git describe --tags --abbrev=0)
Then you need to look for the files that don’t have this tag. A way to do this is using git diff with the --name-only option to compare only the names of the files that are different between the current version of your repo
(HEAD) and the latest tag (the variable LATEST_TAG, that has to be referred with the $VARIABLE syntax). You need the name of all of the release notes (that are placed in releasenotes/notes) to be added to an ignore list (that will be created with this script into docs/release_notes.rst).
This ignore list uses the reno Sphinx and will have this structure:
.. release-notes::
   :ignore-notes:
     ignored_release_note_1,
     ignored_release_note_2,
     ...
The idea is then that for any changed file, you will check if it starts with releasenotes/notes. If that’s the case, you will check whether it’s already part of the ignore list.
In case it’s not part of that list, first you’ll check if that list exists already. If it does not, you’ll create it by adding the heading :ignore-notes:.
Then the release note is added to the list.
The code for this process is then:
for file_changed in `git diff --name-only HEAD $LATEST_TAG`
do
    if [[ $file_changed == releasenotes/notes/* ]]; then
        isInFile=$(grep -Exq "\s*$file_changed," docs/release_notes.rst >/dev/null; echo $?)
        if [ $isInFile -ne 0 ]; then
            isInFile=$(grep -Exq "\s*:ignore-notes:\s*" docs/release_notes.rst >/dev/null; echo $?)
            if [ $isInFile -ne 0 ]; then
                echo "   :ignore-notes:" >> docs/release_notes.rst
            fi
            echo "Release note changed since $LATEST_TAG: $file_changed. Ignore in docs/release_notes.rst"
            echo "     $file_changed," >> docs/release_notes.rst
        fi
    fi
done
Note that the first if requires double square brackets ([[ condition ]]) because it’s comparing a variable to the string releasenotes/notes/*, which uses the wildcard * to indicate that it begins by releasenotes/notes/.
In order to check whether a string is in docs/release_notes.rst, this script is defining the variable isInFile as the exit code (echo $?) of grep -Exq your_string docs/release_notes.rst >/dev/null.
This command would give as output any line that includes the string your_string but we are not interested in that output, so we erase it by directing it to dev/null, as we only want to know whether the file was found (exit code 0).
The -E flag means that patterns are seen as extended regular expressions, so \s* means zero or more (*) whitespaces (\s) instead of being a literal string.
Given the structure of the ignore list, we want to make sure that the line consists of only the expression we are looking for, so we use the -x flag for this purpose.
Finally, the -q flag ensures that no output is written and exit status is 0 if a match is found, ignoring any errors. Also note that when :ignore-notes: and the file names are added to the ignore list, the indentation is respected.
After that, you will print the files of docs/release_notes.rst. This could be done with cat docs/release_notes.rst, but we want to remove any extra whitespaces or line breaks, so you will use this instead:
echo "Contents of docs/release_notes.rst:"
echo $(cat docs/release_notes.rst)
That way echo removes the format from the output of cat docs/release_notes.rst.
Then you will return the status code 0 if the end of the script is reached with:
exit 0
So the tools/ignore_untagged_notes.sh file will look like this:
#!/bin/bash

# This code is a Qiskit project.
#
# (C) Copyright IBM 20XX.
#
# This code is licensed under the Apache License, Version 2.0. You may
# obtain a copy of this license in the LICENSE.txt file in the root directory
# of this source tree or at http://www.apache.org/licenses/LICENSE-2.0.
#
# Any modifications or derivative works of this code must retain this
# copyright notice, and modified files need to carry a notice indicating
# that they have been altered from the originals.

LATEST_TAG=$(git describe --tags --abbrev=0)

for file_changed in `git diff --name-only HEAD $LATEST_TAG`
do
    if [[ $file_changed == releasenotes/notes/* ]]; then
        isInFile=$(grep -Exq "\s*$file_changed," docs/release_notes.rst >/dev/null; echo $?)
        if [ $isInFile -ne 0 ]; then
            isInFile=$(grep -Exq "\s*:ignore-notes:\s*" docs/release_notes.rst >/dev/null; echo $?)
            if [ $isInFile -ne 0 ]; then
                echo "   :ignore-notes:" >> docs/release_notes.rst
            fi
            echo "Release note changed since $LATEST_TAG: $file_changed. Ignore in docs/release_notes.rst"
            echo "     $file_changed," >> docs/release_notes.rst
        fi
    fi
done

echo "Contents of docs/release_notes.rst:"
echo "$(cat docs/release_notes.rst)"

exit 0
Now you only need to set the final script to deploy the documentation! This subscript will be called tools/deploy_documentation.sh.
Like tools/ignore_untagged_notes, this has to start by setting the shell to bash:
#!/bin/bash
In order to cancel the deployment if an error occurs, you will add this line:
set -e
That means that if any command exits with a non-zero exit code, the execution of this script will be aborted.
Now you will use curl to download the latest Linux version of Rclone, that can be found at https://downloads.rclone.org/rclone-current-linux-amd64.deb, and save it as a file called rclone.deb via the -o option.
Then you will download the file with apt-get install with the -y flag to automatically answer “yes” to any question that may appear as part of an interactive download.
curl https://downloads.rclone.org/rclone-current-linux-amd64.deb -o rclone.deb
sudo apt-get install -y ./rclone.deb
Now that you have installed Rclone, you can use the rclone commands. In particular, you can use rclone config file to find the Rclone configuration file and assign it to a variable RCLONE_CONFIG_PATH.
RCLONE_CONFIG_PATH=$(rclone config file | tail -1)
The reason behind the | tail -1 is that the standard output of rclone config file is:
Configuration file is stored at:
/Users/user/.config/rclone/rclone.conf
or, if you don’t have any Rclone configuration file,
Configuration file doesn't exist, but rclone will use this path:
/Users/user/.config/rclone/rclone.conf
So in both cases, the only element we are interested in (the path) is the last one (tail -1).
You can show the current working directory with:
echo "show current dir: "
pwd
Then you will use the AES-256-CBC (256 bit Advanced Encryption Standard with Cypher block chaining) algorithm with the openssl command, along with the encrypted_rclone_key (key or -K) and encrypted_rclone_iv (-iv) to decrypt (-d) the encrypted Rclone configuration file included in the repository, tools/rclone.conf.enc (input or -in), and put its content (output or -out) into
the Rclone configuration file from RCLONE_CONFIG_PATH.
openssl aes-256-cbc -K $encrypted_rclone_key -iv $encrypted_rclone_iv -in tools/rclone.conf.enc -out $RCLONE_CONFIG_PATH -d
Now that your Rclone has the configuration needed to deploy the documentation, it’s time to do it. The command that enables you to upload the built docs from docs/_build/html to the corresponding IBM Cloud Object Storage instance (in our case, qiskit-org-web-resources/ecosystem/hal-provider) is rclone sync.
You can use the --progress flag to get updates of the synchronization process. You need to exclude the files from locale with the --exclude flag.
rclone sync --progress --exclude locale/** ./docs/_build/html IBMCOS:qiskit-org-web-resources/ecosystem/<Enter Your Project Name, e.g. hal-provider>
The full tools/deploy_documentation.sh should then look like this:
#!/bin/bash

# This code is a Qiskit project.
#
# (C) Copyright IBM 20XX.
#
# This code is licensed under the Apache License, Version 2.0. You may
# obtain a copy of this license in the LICENSE.txt file in the root directory
# of this source tree or at http://www.apache.org/licenses/LICENSE-2.0.
#
# Any modifications or derivative works of this code must retain this
# copyright notice, and modified files need to carry a notice indicating
# that they have been altered from the originals.

# Script for pushing the documentation to the qiskit.org/ecosystem.
set -e

curl https://downloads.rclone.org/rclone-current-linux-amd64.deb -o rclone.deb
sudo apt-get install -y ./rclone.deb

RCLONE_CONFIG_PATH=$(rclone config file | tail -1)

echo "show current dir: "
pwd

# Push to qiskit.org/ecosystem
openssl aes-256-cbc -K $encrypted_rclone_key -iv $encrypted_rclone_iv -in tools/rclone.conf.enc -out $RCLONE_CONFIG_PATH -d
echo "Pushing built docs to website"
rclone sync --progress --exclude locale/** ./docs/_build/html IBMCOS:qiskit-org-web-resources/ecosystem/<Enter Your Project Name, e.g. hal-provider>
Now that all the subscripts are done, you can put them together to finish the docs deployment process, along with building the documentation with sphinx-build.
You also need to add earliest_version: 0.1.0 to releasenotes/config.yaml so reno can find the release notes.
run: |
  echo "earliest_version: 0.1.0" >> releasenotes/config.yaml
  tools/ignore_untagged_notes.sh
  sphinx-build -b html docs/ docs/_build/html
  tools/deploy_documentation.sh
shell: bash
So the final version of this step is:
- name: Build and publish
  env:
    encrypted_rclone_key: ${{ secrets.encrypted_rclone_key }}
    encrypted_rclone_iv: ${{ secrets.encrypted_rclone_iv }}
    QISKIT_PARALLEL: False
    QISKIT_DOCS_BUILD_TUTORIALS: 'always'
  run: |
    echo "earliest_version: 0.1.0" >> releasenotes/config.yaml
    tools/ignore_untagged_notes.sh
    sphinx-build -b html docs/ docs/_build/html
    tools/deploy_documentation.sh
  shell: bash
The complete .github/workflows/deploy-docs.yml is then:
# This code is a Qiskit project.
#
# (C) Copyright IBM 20XX.
#
# This code is licensed under the Apache License, Version 2.0. You may
# obtain a copy of this license in the LICENSE.txt file in the root directory
# of this source tree or at http://www.apache.org/licenses/LICENSE-2.0.
#
# Any modifications or derivative works of this code must retain this
# copyright notice, and modified files need to carry a notice indicating
# that they have been altered from the originals.

name: Deploy Docs

on:
  workflow_dispatch:

concurrency:
  group: ${{ github.repository }}-${{ github.ref }}-${{ github.head_ref }}-${{ github.workflow }}
  cancel-in-progress: true

jobs:
  docs_publish:
    if: ${{ startsWith(github.ref, 'refs/heads/stable') && contains('["maintainer-1","maintainer-2", ...]', github.actor) }}
    runs-on: ubuntu-latest
    strategy:
      matrix:
        python-version: [3.8]
    steps:
      - uses: actions/checkout@v3
        with:
          fetch-depth: 0
      - uses: actions/setup-python@v4
        with:
          python-version: ${{ matrix.python-version }}
      - name: Install <Package Name>
        run: |
          pip install -e .
          pip install -U -c constraints.txt -r requirements-dev.txt
        shell: bash
      - name: Install Dependencies
        run: |
          pip install packages
          sudo apt-get install -y other_packages
        shell: bash
      - name: Build and publish
        env:
          encrypted_rclone_key: ${{ secrets.encrypted_rclone_key }}
          encrypted_rclone_iv: ${{ secrets.encrypted_rclone_iv }}
          QISKIT_PARALLEL: False
          QISKIT_DOCS_BUILD_TUTORIALS: 'always'
        run: |
          echo "earliest_version: 0.1.0" >> releasenotes/config.yaml
          tools/ignore_untagged_notes.sh
          sphinx-build -b html docs/ docs/_build/html
          tools/deploy_documentation.sh
        shell: bash
You have created and deployed a new Qiskit documentation project!